


Selecting a flexible floor trim requires a process of comprehensively consideration of material, scenario, and installation. Here is a detailed purchasing guide covering all key factors.
1. First, Identify the Core Need: Why Does It Need to Be Flexible?
The location where you need the edging determines your choice. Typically, flexible trim is used for:
- Curved walls or bar counters
- Columns, stair newels (banisters)
- Irregular shaped floor transitions
- Design-oriented curved platforms or decorations
2. Key Factors to Consider When Choosing Flexible Floor Trim
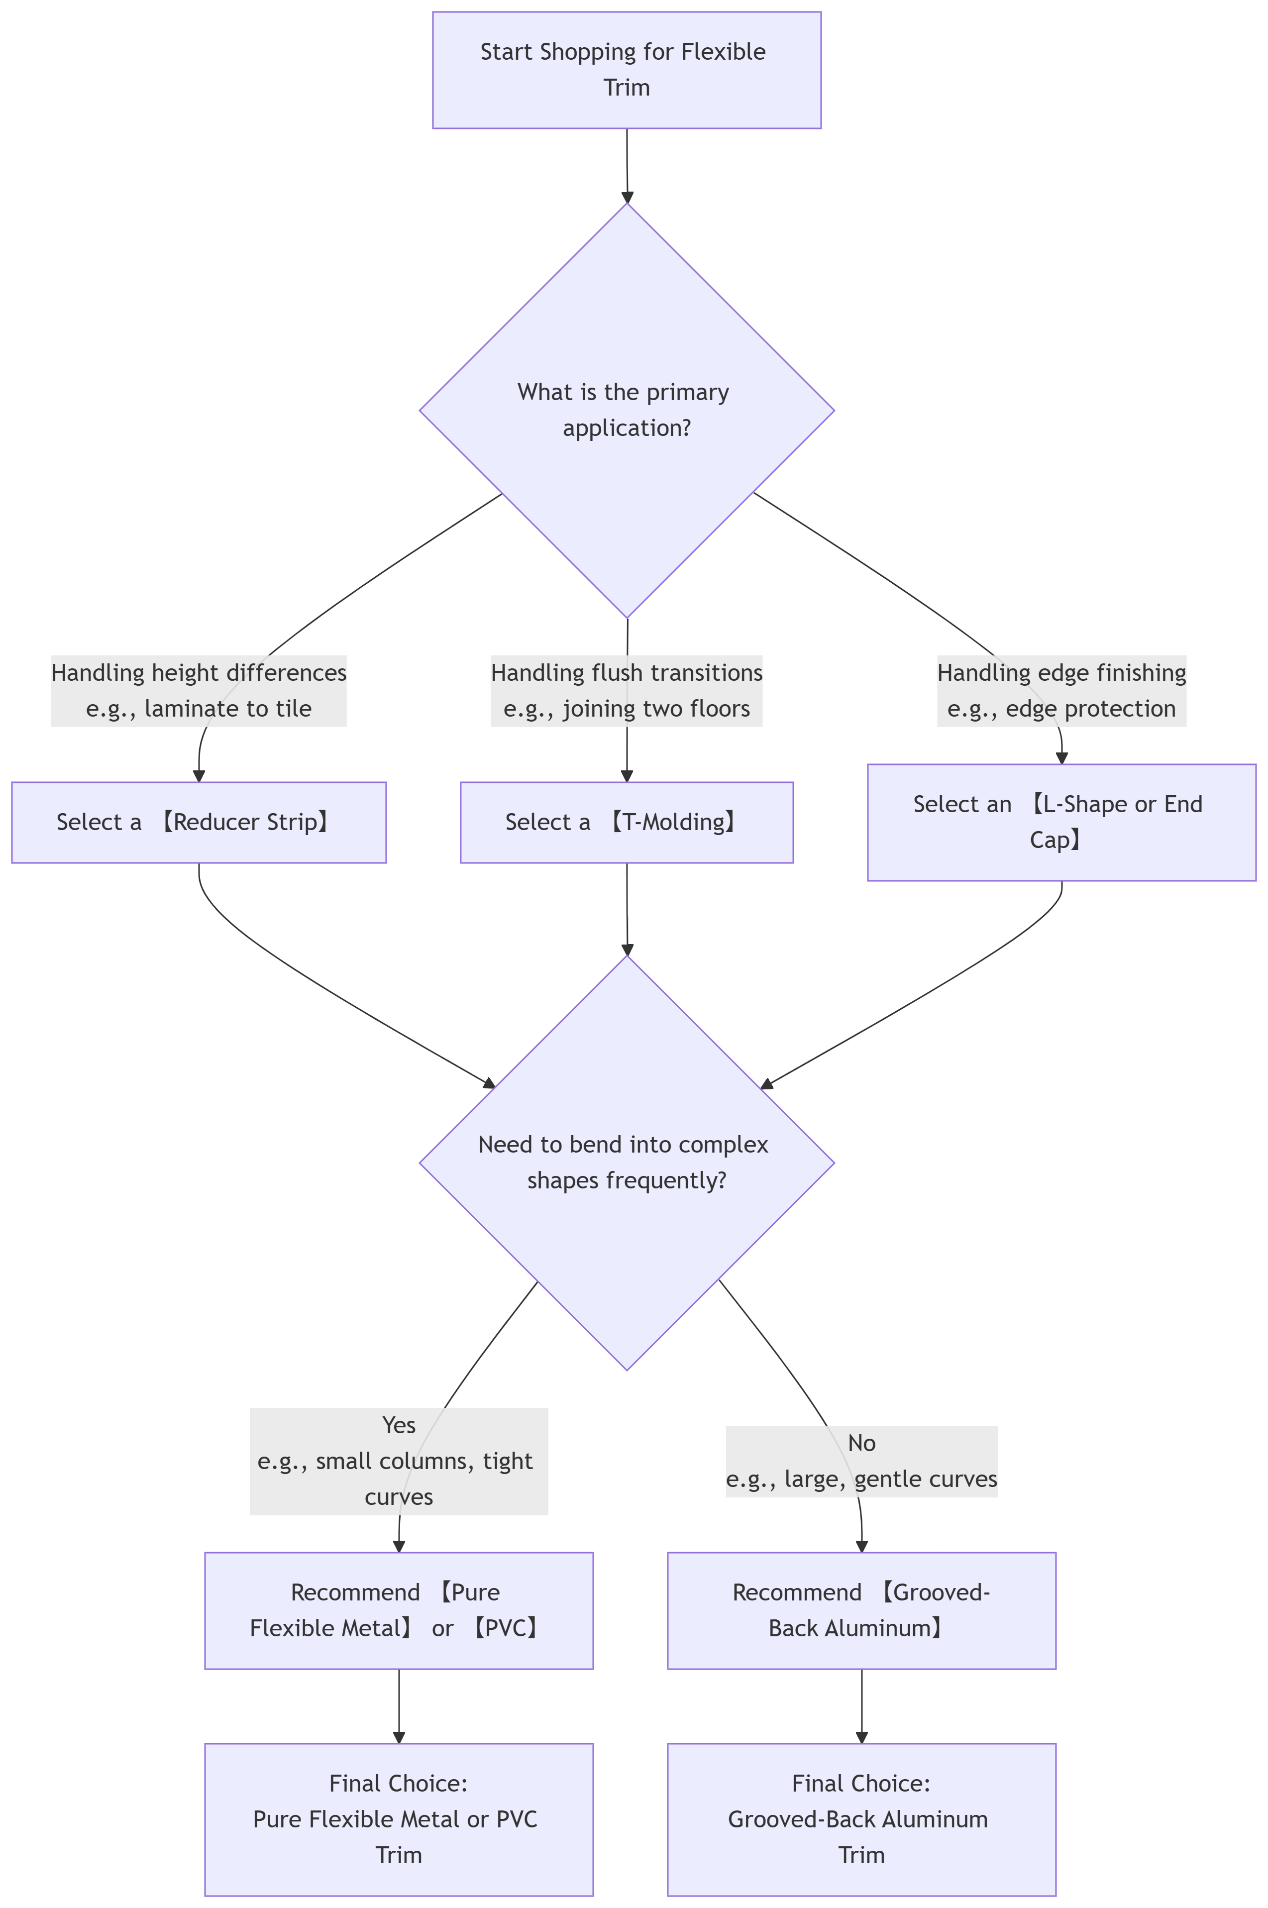
You can follow the steps in the flowchart below to quickly determine the most suitable product type for you:
Flexible Floor Trims ( bendable Profiles)
3. Determine the Material
The material determines how easily it bends, its aesthetics, and durability.
| Material Type | Pros | Cons | Best For |
| PVC (Plastic) | - Extremely flexible, handles very tight radii - Inexpensive – Easy to install, can be cut yourself |
- Cheap look and feel – Not scratch-resistant, can wear/discolor – Limited color options |
- Budget-limited or temporary solutions – Low-visibility areas like storage rooms – Very complex curves |
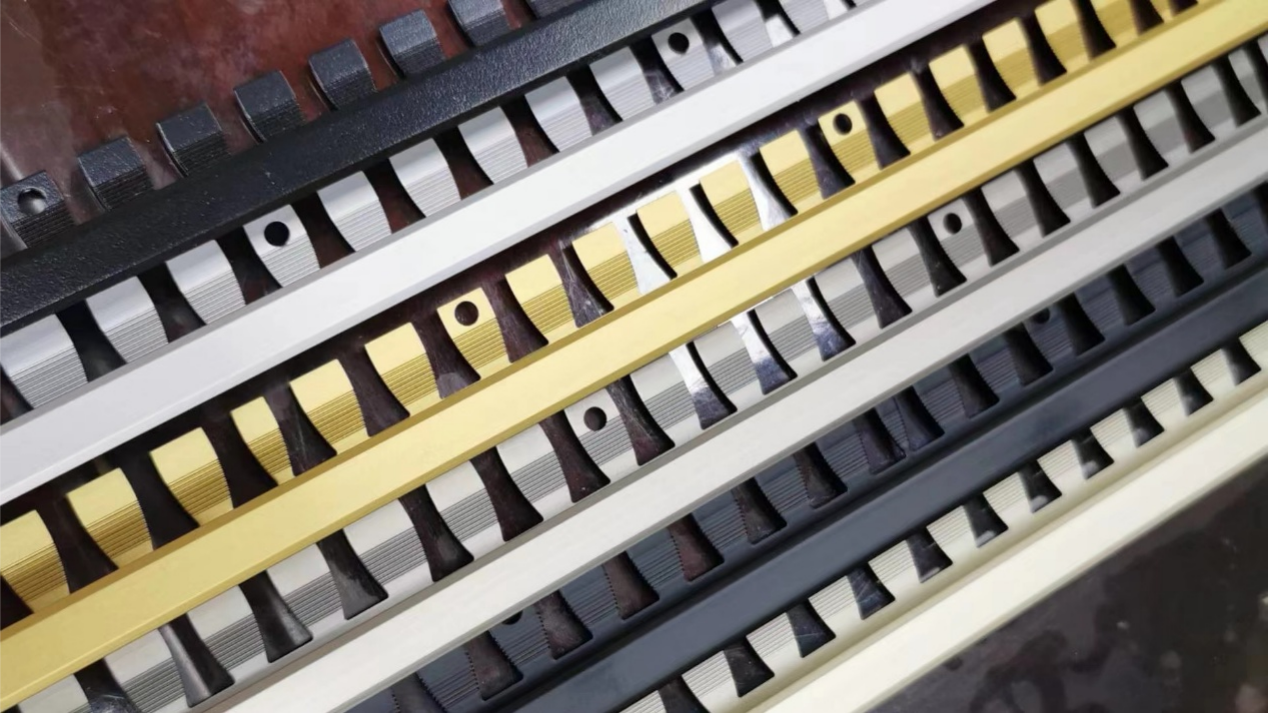
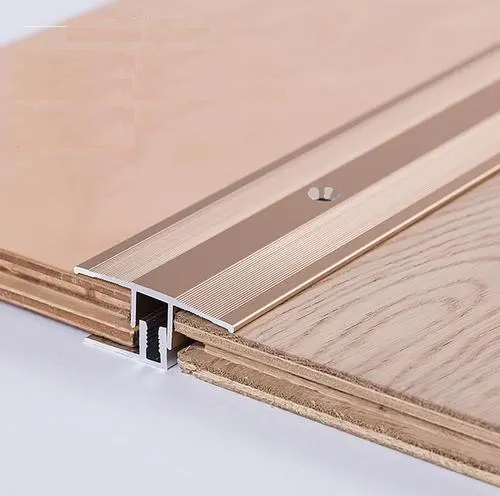
| Aluminum (Grooved Back) | - High-end look and feel, durable – Variety of finishes (brushed, anodized) - High strength, good protection – Bends via grooves cut into the back |
- Higher price – Requires some skill to bend, cannot be over-bent – Has a minimum bend radius |
- The top choice for most home & commercial scenarios – Bar edges, curved corners, stairs<br- Where it needs to match modern, minimalist styles |
| Pure Flexible Metal (e.g., soft steel core with surface coating) | - Truly flexible, can be bent arbitrarily – Surface can be PVC, metal film, etc. – Stronger than pure PVC |
- Mid to high range price – Surface coating can be scratched |
- Wrapping small columns or very irregular shapes – Designs requiring extreme flexibility |
4. Determine the Type and Function
The shape of the trim defines its function.
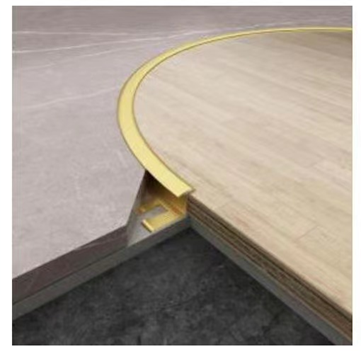
- Reducer Strip: Used to join two floorings with a height difference (e.g., wood to tile). The profile is usually an L-shape or ramped, with one high and one low end.

- T-Molding / Bridge Strip: Used to join two floorings of the same height. The profile is a T-shape, acting as a bridge and covering the gap.
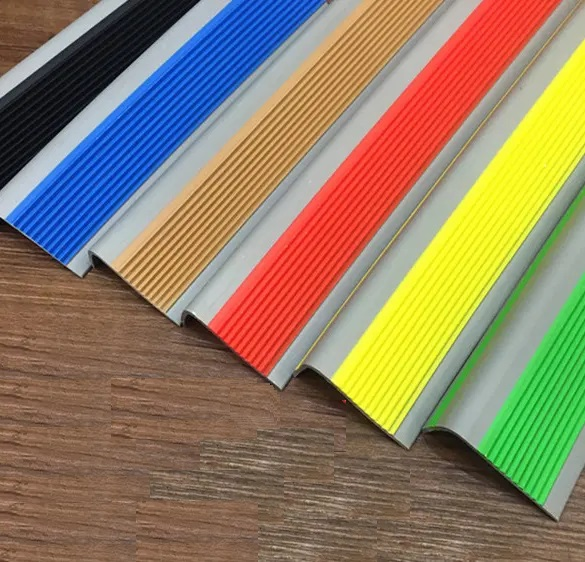
- L-Shape / End Cap / Stair Nosing: Mainly used for protecting the edge of steps (stair nosing) or finished floor edges, preventing chips and damage.
5. Pay Attention to Key Specifications
- Bend Radius: This is the most important parameter! It refers to the smallest radius the trim can be bent to without breaking or deforming. A smaller curve (tighter bend) requires a smaller minimum bend radius. Always ask the seller if the product’s minimum bend radius meets your needs before buying.
- Size: Measure the gap width and height difference that needs covering, then choose the right size trim. Common lengths are 0.9m, 1.2m, 2.4m, etc.
- Color and Finish: Choose a trim color that matches your floor, door frames, or baseboards for a harmonious look. Common colors: Silver, Bright Black, Matte Black, Champagne Gold, Brushed Aluminum, Rose Gold, etc.
6. Installation Method
- Glue-Down (Most common): Apply a high-quality construction adhesive (e.g., silicone structural adhesive) to the back of the trim or into the floor channel, then press to secure. Widely applicable, but harder to replace later.
- Screw-Down: More secure. Used primarily for stair nosings or areas subject to impact. Requires drilling holes into the trim and subfloor for screws.
- Snap-On / Track-Based: Requires installing a track/base onto the floor first, then snapping the trim cap onto the track. Easiest installation, best for future replacement/maintenance, but requires a very flat floor and precise track installation.
7. Purchasing Summary and Steps
- Measure and Plan: Measure the curves and dimensions. Determine if you need to resolve a height difference or a flush transition.
- Set Your Budget: Choose PVC for a limited budget; choose aluminum for premium feel and durability.
- Match the Style: Select the color and finish based on your home’s decor (e.g., matte black or brushed metal for minimalist styles).
- Consult the Seller: Always tell the seller your specific use case (wrapping a column or a curved wall) and the curve tightness. Confirm the product’s minimum bend radius and installation method.
- Prepare Tools: If installing yourself, prepare tools like a caulking gun & adhesive, tape measure, handsaw or angle grinder (for cutting), clamps (to hold the shape while bending), etc.
Final Reminder: For complex curved installations, especially with expensive aluminum trim, test bend a small piece first to understand its properties before installing the full length, to avoid waste from incorrect operation. If unsure, hiring a professional is the safest bet.
Post time: Sep-08-2025